help with front suspension.

edgelett

Well-known member
It’s explained pretty good in your owners manual.
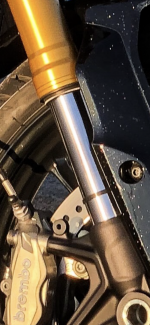
yeah I get that mate, and I could understand HOW to adjust just couldn't work out WHAT 'screw' needed adjustment.
As I said this is the first bike I've ever owned with adjustable front suspension so I was reading 'turn the screw' and thinking 'what screw?'
Wasn't aware I needed to look inside the top of the fork (which I couldn't see properly anyway due to the bars lol)

again, appreciate everyone's help.
 

Zilonis

Member
Lots of good info already laid out here but I'd like to add a few thing may help with the process and also give you a better understanding of how all fully adjustable suspension works.

The first thing you should adjust, on both the Shock and the Forks, is the preload. Do this first! Adjusting the preload sets your "sag" or how far the suspension drops when YOU sit on your bike. Setting sag usually requires 2 people a tape measure and some cold drink's.
- A good starting point is ~25% sag.
This means that if our S models have 6" travel total (I think it's technically 5.9") when you sit on the bike the forks should drop 1.5" and your helper should measure 4.5" remaining on the fork stanchions (the silver part that goes into the gold uppers). How much you weigh has everything to do with the proper sag! If I'm 200lbs and my forks are at a perfect 25% sag when I sit on it... when my 400lb friend sits on the bike they're definitely going to use more like 30-35% travel. We'd both get very very different riding experiences.

Once your sag is worked out I'd suggest moving on to the Compression/Left side (C). Compression sets how hard it is to push the suspension down. I just use a small flat blade screw driver, carefully at a slight angle to adjust. No need to move the bars if you're careful.
- Turn the C fully clockwise to set it at the hardest setting (Full IN)
- Turn the C fully counter-clockwise to set it at the softest setting (Full OUT)
- A good way to remember, and how the manual explains, is to start fully clockwise (Full IN) and then count how many counter-clockwise clicks OUT you end up with when it's comfortable for you.
As an example the manual says 5 clicks out for aggressive riding (think track days) and 10 clicks our for general riding. I know mine is set at 7 click's out, so I use that as my own reference if I need to make adjustments. If I'm messing with the clicks and forget my position I'll just go Full IN again and then count 7 click's out.

After the Compression is set you should move on to the Right side of the for Rebound (R). Rebound simply determines how quickly the forks return to your sag position after being compressed. This is tuned the same way as the compression so no need to explain again how this dial works (same Full IN/Full OUT functionality)
- I personally like a fast-ish rebound but not too fast, I'm currently at 5 clicks out.
- I would suggest messing with this dial to see it in action. Go Full OUT on the R dial, push on the forks and watch how slow they return neutral position. Then go full in and test again to see how quickly the forks return. Too slow will eat up all your suspension if you're on a very bumpy road. Too fast and you'll feel it bucking and it'll be less smooth and comfortable, depending your riding of course.

I know this is a lot of info but when it comes to fully adjustable suspension there is quite a bit to know and understand to get the most out of your bike.

My bike came set up stiff as a board and it was a bit uncomfortable. I adjusted the preload on my shock and forks first, worked out the compression to my liking and then dialed in my rebound. It rides like a completely different bike after setting up the suspension to my weight and riding style.

If you have any questions about setting up the shock that can be covered as well, I only spoke on adjusting the forks here.
 
Last edited:

Max Kool

Well-known member
This means that if our S models have 6" travel total (I think it's technically 5.9") when you sit on the bike the forks should drop 1.5" and your helper should measure 4.5" remaining on the fork stanchions (the silver part that goes into the gold uppers).
Nope, when our forks bottom out you still have 26mm chrome left. Took mine apart the other day and measured it.
 

Zilonis

Member
Nope, when our forks bottom out you still have 26mm chrome left. Took mine apart the other day and measured it.

Hmm ok, good to know! There must be a bump-stop built in to prevent bottom out which could really damage the seals and or dust wiper.

Does this mean there is 7" chrome exposed with 6" (152.4mm) useable? I'm goin to take some measurements on lunch break and report back with my findings.
 

ferraiolo1

2021-2024 IMR Ambassador
Staff member
This is where it bottoms out at
 

Attachments

  • F1D21359-275B-4831-8B51-D2D395898D2C.png
    F1D21359-275B-4831-8B51-D2D395898D2C.png
    6.8 MB · Views: 29

edgelett

Well-known member
Thanks again everyone,
we're away this weekend so I will probably have a look at it next weekend (unless we both get home early enough from work to have a go).
do I need to be careful about scratching up my pre-load bolts by using an adjustable wrench?
 

Max Kool

Well-known member
They're not anodized, so a scratch won't catch your eye that easily, but a little painter's tape may prevent them.
 

edgelett

Well-known member
cheers mate. Don't have the exact tool for them so will see how we go.

Again, appreciate everyone's help.
 

Azzman

Member
Thanks again everyone,
we're away this weekend so I will probably have a look at it next weekend (unless we both get home early enough from work to have a go).
do I need to be careful about scratching up my pre-load bolts by using an adjustable wrench?
I wouldn’t use a shifter go buy the correct size 🔧 from super cheap it’s 19 mm if I recall at least you got the right tool then
 

edgelett

Well-known member
adjusted it a little on my own today as my better half was working. feels better but need to get that preload measured properly so will do that with him tomorrow.
 
Top